12 Exciting STEAM Projects for Kids Aged 7-17
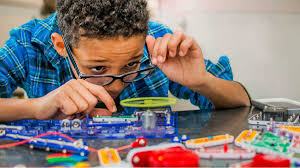
1. Paper Circuits
Grade Level: 4th to 7th Grade
Age Range: 9–13 years
Objective: Teach kids about basic electrical circuits and conductivity.
Materials:
- Copper tape.
- LED lights.
- Button batteries.
- Cardstock or thick paper.
- Tape and scissors.
Instructions:
- Design the Circuit:
- Draw a simple circuit on the cardstock, showing where the battery and LED will connect.
- Lay the Copper Tape:
- Stick copper tape along the circuit lines. Ensure no breaks in the tape.
- Add the LED and Battery:
- Place the LED where indicated, ensuring its legs touch the copper tape.
- Secure the button battery in position with tape, ensuring proper polarity.
- Test the Circuit:
- Press the battery into the tape to close the circuit and light up the LED.
Guidelines for Learning:
- Explain how electricity flows through the circuit.
- Encourage kids to design creative shapes (e.g., stars or letters) with their circuits.
2. Build a Straw Bridge
Grade Level: 3rd to 6th Grade
Age Range: 8–12 years
Objective: Demonstrate structural engineering and problem-solving.
Materials:
- Drinking straws.
- Tape or glue.
- Scissors.
- Small weights (e.g., coins or small toys).
Instructions:
- Plan the Design:
- Research different types of bridges (e.g., beam, arch, suspension).
- Sketch a blueprint of the bridge.
- Construct the Bridge:
- Use straws to create the frame and base.
- Reinforce the structure by taping straws together in triangles or other stable shapes.
- Test the Bridge:
- Place weights on the bridge to see how much it can hold.
- Refine the Design:
- Adjust and reinforce weak points to increase the bridge’s capacity.
Guidelines for Learning:
- Discuss how forces like tension and compression affect structures.
- Challenge kids to optimize their bridge for maximum strength using minimal materials.
3. Create a Sundial
Grade Level: 5th to 8th Grade
Age Range: 10–14 years
Objective: Teach kids about time measurement, the Earth’s rotation, and shadow movement.
Materials:
- Paper plate or cardboard circle.
- Straw or stick.
- Markers.
- Compass (optional for direction).
Instructions:
- Assemble the Sundial:
- Poke the straw or stick through the center of the paper plate to act as a gnomon (shadow caster).
- Position the Sundial:
- Place the plate outdoors on a flat surface. Align the straw towards the North using a compass.
- Mark the Hours:
- Throughout the day, observe the shadow and mark its position on the plate at each hour. Label the hours accordingly.
- Test the Sundial:
- Use the sundial to estimate time on subsequent days and compare with a clock.
Guidelines for Learning:
- Discuss the relationship between the Sun’s position and time.
- Explain how sundials were historically used before mechanical clocks.
4. Baking Soda Volcano
Grade Level: 2nd to 5th Grade
Age Range: 7–11 years
Objective: Demonstrate chemical reactions and volcanic eruptions.
Materials:
- Plastic bottle.
- Baking soda.
- Vinegar.
- Dish soap.
- Red food coloring.
- Modeling clay or papier-mâché (to create a volcano structure).
- Tray (to contain the mess).
Instructions:
- Build the Volcano:
- Use modeling clay or papier-mâché to form a volcano shape around the bottle. Leave the bottle neck exposed.
- Prepare the Eruption Mixture:
- Add 2 tablespoons of baking soda, a few drops of dish soap, and red food coloring to the bottle.
- Erupt the Volcano:
- Pour vinegar into the bottle and step back to watch the eruption.
- Repeat and Explore:
- Adjust the amounts of baking soda and vinegar to create different eruption sizes.
Guidelines for Learning:
- Explain the chemical reaction between baking soda (a base) and vinegar (an acid).
- Discuss real-life volcanoes and compare the experiment to actual volcanic activity.
5. Water Purification Experiment
Grade Level: 5th to 8th Grade
Age Range: 10–14 years
Objective: Teach kids about filtration and water purification methods.
Materials:
- Empty plastic bottle.
- Gravel.
- Sand.
- Charcoal (crushed).
- Coffee filter or cloth.
- Dirty water (can be made with soil and water).
Instructions:
- Prepare the Filter:
- Cut the bottom off the plastic bottle and turn it upside down.
- Layer gravel, sand, and crushed charcoal inside the bottle, with a coffee filter or cloth at the bottom.
- Filter the Water:
- Pour dirty water through the top of the bottle.
- Collect the filtered water in a clean container at the bottom.
- Observe and Evaluate:
- Compare the filtered water to the original dirty water.
- Discuss Limitations:
- Explain why this is only a physical filtration method and how further purification (e.g., boiling) is needed for safe drinking water.
Guidelines for Learning:
- Explore real-world water purification challenges.
- Discuss how these principles are used in water treatment plants.
6. Balloon-Powered Car
Grade Level: 4th to 6th Grade
Age Range: 9–12 years
Objective: Teach kids about Newton’s Third Law of Motion.
Materials:
- Plastic bottle.
- Straws.
- Balloons.
- Skewers or pencils (for axles).
- Plastic bottle caps (for wheels).
- Tape and scissors.
Instructions:
- Build the Car Base:
- Use the bottle as the car body. Attach straws to the bottom for axles.
- Insert skewers or pencils through the straws and attach bottle caps as wheels.
- Add the Balloon:
- Tape a balloon to the end of a straw, ensuring it is sealed tightly. Insert the other end of the straw into the bottle.
- Test the Car:
- Inflate the balloon through the straw, release it, and observe the car’s motion.
- Refine Design:
- Experiment with different sizes and shapes to improve speed and distance.
Guidelines for Learning:
- Discuss action-reaction forces.
- Encourage predictions on how changes to the design affect performance.
7. DIY Periscope
Grade Level: 3rd to 6th Grade
Age Range: 8–12 years
Objective: Teach kids about the reflection of light and its applications.
Materials:
- Two small mirrors.
- Cardboard or sturdy paper.
- Tape and scissors.
Instructions:
- Construct the Periscope Body:
- Cut a long, rectangular tube out of cardboard.
- Create angled slots at the top and bottom to fit the mirrors.
- Install the Mirrors:
- Place mirrors into the slots at 45-degree angles, facing each other.
- Tape them securely in place.
- Test the Periscope:
- Use the periscope to look over obstacles, such as a table or wall.
Guidelines for Learning:
- Explain how light travels and reflects off surfaces.
- Discuss real-world uses, like in submarines or tanks.
8. Egg Drop Challenge
Grade Level: 5th to 9th Grade
Age Range: 10–15 years
Objective: Teach kids about physics concepts like impact and force distribution.
Materials:
- Eggs.
- Straws, cotton, and tape.
- Bubble wrap, cardboard, and string (optional).
Instructions:
- Design the Protector:
- Using the materials provided, build a protective casing for the egg.
- Drop the Egg:
- Drop the egg from a height (e.g., 2–3 meters).
- Evaluate Success:
- Check if the egg survived the drop.
- Modify the design and test again if necessary.
Guidelines for Learning:
- Discuss how energy and force are absorbed or distributed in different designs.
- Encourage teamwork and creative problem-solving.
9. Simple Water Filter
Grade Level: 4th to 6th Grade
Age Range: 9–12 years
Objective: Teach kids about water filtration and environmental science.
Materials:
- Plastic bottle (cut in half).
- Sand, gravel, and activated charcoal.
- Cotton or coffee filters.
- Dirty water (e.g., water mixed with soil).
- Tape or rubber band.
Instructions:
- Prepare the Bottle:
- Invert the top half of the bottle to create a funnel.
- Place a coffee filter or cotton at the narrow end to hold the materials.
- Layer the Filter:
- Add a layer of activated charcoal, followed by sand, and then gravel. Each layer should be about 2–3 cm thick.
- Test the Filter:
- Pour dirty water through the filter. Collect the filtered water in the bottom half of the bottle.
- Observe Results:
- Discuss the clarity of the filtered water compared to the original sample.
Guidelines for Learning:
- Explain the role of each layer in removing impurities.
- Discuss real-world applications of water filtration and its importance in providing clean water.
10. Lava Lamp Experiment
Grade Level: 2nd to 4th Grade
Age Range: 7–10 years
Objective: Teach about density and immiscibility.
Materials:
- Clear plastic bottle or glass jar.
- Vegetable oil.
- Water.
- Food coloring.
- Alka-Seltzer tablets.
Instructions:
- Prepare the Lamp:
- Fill the bottle one-quarter with water and three-quarters with oil.
- Add a few drops of food coloring to the water (it will sink).
- Create the Reaction:
- Drop an Alka-Seltzer tablet into the bottle. Watch bubbles form and create a “lava lamp” effect.
- Repeat:
- Add more tablets as needed to continue the effect.
Guidelines for Learning:
- Discuss why oil and water don’t mix (different densities and polarities).
- Explain how the reaction creates gas bubbles that move through the liquid.
11. Straw Roller Coaster
Grade Level: 5th to 8th Grade
Age Range: 10–14 years
Objective: Teach kids about physics, gravity, and energy transfer.
Materials:
- Straws.
- Tape or glue.
- Marbles or small balls.
- Cardboard or foam board (base).
Instructions:
- Build the Frame:
- Use straws to construct supports and tracks for the marble. Tape them to the cardboard base.
- Design the Track:
- Create slopes, loops, and turns using the straws. Ensure the marble can roll smoothly.
- Test and Adjust:
- Roll the marble through the track. Adjust angles and supports for better performance.
Guidelines for Learning:
- Discuss potential and kinetic energy.
- Highlight how gravity and friction influence the marble’s motion.
12. DIY Kaleidoscope
Grade Level: 3rd to 6th Grade
Age Range: 8–12 years
Objective: Explore light reflection and symmetry.
Materials:
- Cardboard tube (e.g., from paper towels).
- Shiny cardstock or reflective foil.
- Transparent plastic or wax paper.
- Beads, sequins, or small colorful objects.
- Tape and scissors.
Instructions:
- Prepare the Reflective Surface:
- Cut the shiny cardstock into three rectangles and tape them together to form a triangular prism.
- Assemble the Tube:
- Insert the prism into the cardboard tube.
- Tape transparent plastic over one end of the tube to hold the colorful objects.
- Add the Beads:
- Place beads or sequins between two layers of plastic or wax paper. Tape this to the end of the tube.
- Use the Kaleidoscope:
- Look through the open end and rotate the tube to see symmetrical patterns.
Guidelines for Learning:
- Explain how light reflects inside the prism to create patterns.
- Discuss symmetry and how different objects create unique designs.


